Last updated November 18, 2026







Free in-home design visit - walk-in showers, tub-to-shower conversions, and Kohler, Moen, and Delta fixtures planned to your exact space
Bathroom Remodeling Emergency Preparedness Guide for North Las Vegas Homes
Most bathroom water damage we’re called out to inspect didn’t start with a dramatic burst. It started with a slow drip behind a wall, a shut-off valve nobody had turned in years, or a supply line that failed at the crimp because the water here runs hard. The homeowner did the sensible thing and called a plumber. What they couldn’t do was stop the water in the first five minutes, because nobody had ever shown them where the valve was or whether it still worked. That gap between “something’s wrong” and “water is everywhere” is where the real cost lives. This guide gives North Las Vegas homeowners a practical response protocol: how to map and test every shut-off in the bathroom, what to do in the first 30 minutes of a failure, how to document your fixtures for insurance, and what belongs in a post-remodel emergency kit. It’s written for people who’d rather prevent a disaster than react to one.
Quick Answer
A bathroom water emergency in North Las Vegas is best handled by shutting off the water at the fixture valve first, then the branch or main shut-off if that valve is frozen or won’t hold, and then calling for help. The single most valuable thing you can do before an emergency is locate and test every shut-off valve in the bathroom, confirm it still turns, and label it. Homes that have done this lose far less to water damage than homes where the valve is found an hour into the leak. Preparedness is a 20-minute job you do once, not a panic response you improvise at 2am.
Styles & brands we work with
- Walk-in shower
- Tub-to-shower
- Freestanding tub
- Kohler
- Moen
- Delta
- Frameless glass
Table of Contents
- How to Map and Test Every Shut-Off Valve in a North Las Vegas Bathroom
- The First 30 Minutes of a Bathroom Water Emergency
- How North Las Vegas Water Quality Affects Valve and Supply Line Failure
- How to Document Your Bathroom for Insurance Before You Ever Need It
- What Changes After a Remodel: Emergency Prep for New Fixtures
- The Bathroom Emergency Kit a Specialist Actually Recommends
- Which Fixtures Fail First, and When to Replace Them
- When Preparedness Turns Into a Remodel Decision
How to Map and Test Every Shut-Off Valve in a North Las Vegas Bathroom
Most homeowners can point to the main water shut-off in their garage or at the street. Very few can point to the shut-off for the toilet, the sink, or the shower mixing valve. That’s the gap. In a bathroom emergency, the fastest water stop is almost always the fixture shut-off, not the main. Here’s how to find and prove every one.
Step 1: Locate the fixture shut-offs
Look behind and below each fixture. Toilets typically have an angle stop on the wall behind the bowl at floor level, connected to the supply line. Sinks have two – hot and cold – under the cabinet. Showers and tubs are different: a tub-and-shower valve is usually controlled at the main or at a dedicated valve behind an access panel, often in an adjacent closet or hallway wall. Find that panel before you need it.
Step 2: Confirm the main and branch shut-offs
Know where your main shut-off is and how it turns (a gate valve turns many rotations; a ball valve is a quarter-turn). Many North Las Vegas homes also have a branch shut-off that isolates the bathroom group. Knowing which valve isolates only the bathroom saves you from shutting off water to the whole house when one toilet is leaking.
Step 3: Test each valve by turning it
Turn each fixture valve off, then open the tap briefly to confirm water actually stops. Then turn it back on. Valves that have sat open for years can seize, and a valve you can’t turn under pressure is a valve you can’t trust. Test them once a year.
Step 4: Label and photograph
Tape a small label near each valve (“toilet,” “sink hot,” “sink cold”) and take a photo of each with your phone. Store those photos in a cloud album or email them to yourself. In a dark, wet emergency, you’ll be looking at your phone, not crawling under a cabinet with a flashlight.
Step 5: Check the supply lines
Look at the flexible supply lines under the sink and behind the toilet. Braided stainless lines last longer than the older rubber and plastic types, and any line that feels stiff, cracked, or shows mineral crusting at the crimp is a candidate for replacement. This is exactly the kind of detail a Bathroom Remodeling North Las Vegas specialist checks on every project, because a beautiful new vanity hides the same supply lines it sits on.
Step 6: Write it down
Keep a one-page sheet in a kitchen drawer or taped inside a bathroom cabinet listing the valves, what they control, and the main shut-off location. Add the name of your water provider and your insurer’s claim line. That sheet is worth more in the first ten minutes of a leak than anything else in the house.
The First 30 Minutes of a Bathroom Water Emergency
The first 30 minutes decide whether you’re drying a floor or replacing a subfloor. The key is to work in a fixed order so you don’t freeze up. Here’s the sequence we give homeowners, in priority order.
- Stop the water at the source. If you know the fixture valve, close it. If that valve won’t turn or won’t hold, go to the branch or main shut-off. Don’t spend five minutes looking for the perfect valve while water spreads – go to the main if you have to.
- Kill the power to the room. If water is anywhere near an outlet, a switch, a light fixture, or a fan, switch off the bathroom circuit at the breaker panel. Water plus live electricity is the one emergency in this room that can hurt you.
- Contain the spread. Towels at the threshold, a rolled towel around the toilet base, a bucket under an actively dripping line. Water migrates along the subfloor faster than it looks on the surface.
- Protect what matters. Move rugs, bath mats, medications, and anything on the floor out of the room. Lift the vanity contents off the bottom shelf.
- Ventilate and start drying. Open the window if you can, run the exhaust fan, and set up a fan or dehumidifier on the wet area. Standing water in a North Las Vegas bathroom in summer can start to smell and grow surface mold within a day.
- Don’t poke at the wall. Resist the urge to cut open drywall to “see how bad it is.” Take photos first. Cutting before documentation can complicate a claim.
- Call for help. Call (844) 834-0636. We answer 24/7. Fast dispatch from 7am to 7pm, Sunday through Friday. A professional can stop the leak, assess the water spread, and tell you what needs drying versus what needs replacing.
One point worth repeating: safety first. If the leak is near the electrical panel, or if you smell gas anywhere in the house, leave and call from outside. Don’t reach into a wet panel or a flooded cabinet to flip a breaker if the panel itself is wet.
How North Las Vegas Water Quality Affects Valve and Supply Line Failure
Water quality is the quiet variable most homeowners never connect to their plumbing failures. Southern Nevada water runs hard, meaning it carries a high load of dissolved minerals. That’s not a scare tactic – it’s a maintenance reality. Hard water leaves mineral deposits on the inside of valves, aerators, and supply lines, and those deposits change how the parts behave over time.
What hard water does inside a bathroom
- Valve seats and cartridges: Mineral scale builds on the seat of a shut-off or mixing valve, so a valve that once turned smoothly can become stiff or fail to fully close. A valve that “won’t quite shut off” is a common precursor to a leak.
- Supply lines: The crimp where a flexible line meets its fitting is a scale trap. Scale and corrosion at the crimp weaken the connection and are a frequent point of failure.
- Drain pans and grout: Mineral deposits at a shower pan or drain flange, combined with normal movement in the house, can open a hairline crack that only shows up when the pan holds water.
- Water heaters and mixing valves: This is a bathroom-adjacent point, but scale in the hot water system raises temperature fluctuations at the mixing valve, which stresses cartridges.
Why this matters compared to softer-water markets
In markets with soft water, a shut-off valve can sit untouched for a decade and still turn easily. In North Las Vegas, the same valve may stiffen within a few years of use. We recommend testing every bathroom valve once a year and replacing any that won’t turn cleanly. If you’re already planning a remodel, the water quality is one more reason to choose fixtures and valve brands that hold up well to hard water – more on that below.
Mitigation you can add
A whole-home softener or point-of-use filtration reduces scale, but it doesn’t eliminate the need to check valves and supply lines. The simplest habit: once a year, turn every bathroom shut-off off and on while you’re doing your other home maintenance, and note any that feel stiff. That single routine keeps you ahead of the type of failure that floods a floor.
How to Document Your Bathroom for Insurance Before You Ever Need It
Insurance claims go smoother when you can prove what you had and when it was installed. Insurers can’t pay fairly for a bathroom they can’t see, and adjusters can’t date a fixture that has no record. The good news: building a documentation file is an afternoon’s work, and it’s the most valuable prep you can do that doesn’t involve a wrench.
What to photograph
- Every wall, ceiling to floor, in good light.
- Under each sink cabinet, showing the supply lines and valves.
- Behind the toilet: the supply line, valve, and mounting flange.
- The shower or tub surround, the drain, and any caulk lines or grout seams.
- The floor with the bath mat pulled back, and the threshold.
- Any water heater or water treatment equipment serving the room.
What to write down
- The age and brand of each major fixture. If you don’t know, the name plate on the toilet tank or the underside of a sink can often tell you.
- When the room was last remodeled, and what was done – new supply lines? new valve? new floor? This is the kind of history that tells an adjuster what’s actually at risk.
- The water treatment equipment you have, and its installation date.
- The name of your insurer, your policy number, and the claims line – in the same file.
Keep a digital copy off-site
Put the photos and the record in a cloud folder or email them to yourself. If the floor floods, your paper file isn’t going to survive on the bathroom counter. A phone photo sent to yourself the day before an emergency is worth its weight in gold. When we do a bathroom remodel in Whitney, part of the handoff we recommend is documenting the new install the same way, so the record starts from day one of the new fixtures.
If you’re not sure what you have or how old it is, a professional inspection can fill in the gaps. Whitney homeowners in older homes often have the most to gain from this, because fixture ages there vary widely from house to house.
What Changes After a Remodel: Emergency Prep for New Fixtures
A remodel is a fresh start on your emergency plan, and it’s the easiest time to build one. New fixtures mean new shut-offs, new supply lines, and new waterproofing, and the choices you make at installation directly affect how easy a future emergency is to handle. We’ve handled enough bathroom remodels to know that the products and details you choose quietly decide what the first five minutes of a failure will feel like.
Shut-off valves get better, so use the upgrade
Older angle stops can be replaced with quarter-turn ball valves during a remodel. A quarter-turn valve is easier to find by feel and easier to close under pressure than a multi-turn gate valve. Ask that your new vanity or toilet installation include new quarter-turn stops and new braided supply lines. It’s a small line item with a big payoff.
Waterproofing behind the tile matters now
A shower that’s properly waterproofed handles a slow leak far better than a surface-tiled one. Schluter Systems products are the waterproofing and tile-edge layer we rely on for the shower floor, curb, and wall junctures – the layer you never see after the tile goes on. It’s the difference between water that stays in the shower and water that finds the subfloor.
Fixture brands chosen for the long haul
When you’re choosing fixtures, pick brands with parts and cartridges that are easy to source, because a mixing valve that can’t be repaired is one that has to be replaced. The right answer depends on your bathroom and budget: walk in shower work often calls for dependable, serviceable valve brands like Moen or Delta, while a spa-level install may lean toward Grohe or Toto. We keep an eight-brand portfolio – Kohler, Moen, Delta, American Standard, Toto, Schluter, Sterling, and Grohe – so the choices follow what your bathroom needs, not a single supplier’s shelf.
Then document the new install
Once the remodel is done, photograph the open walls and plumbing before the drywall and tile go back, if you can arrange it with your installer. Those photos are the best proof of what’s behind the wall, and they take minutes to save. If you’re considering a bathroom remodeling project, ask about a handoff that includes a valve map and a supply line record for the new fixtures.
The Bathroom Emergency Kit a Specialist Actually Recommends
A bathroom emergency kit doesn’t belong in the garage with the general tools. It belongs near the bathroom – a plastic tote in the hall closet or under the sink. Homeowners who grab a single pre-packed box during a leak move faster and make fewer mistakes than those who hunt for a towel and a wrench at the same time. Here’s what we recommend, and why.
The core kit
- Two adjustable wrenches (one small, one medium) – enough to close a valve or loosen a supply line. Include a small basin wrench if your stops are hard to reach.
- Old towels and a large absorbent mat. More than you think you need.
- A bucket or two. A 5-gallon bucket under an active drip is the difference between a damp floor and a flooded one.
- A flashlight and headlamp. Under-cabinet valves are dark even at noon.
- Waterproof tape and a hand-held rubber patch. A temporary wrap around a leaking supply line holds until help arrives.
- Garbage bags and painters’ tape. Bag up anything you need to move or cover.
The fixture-brand-specific items
Different brands and install types call for slightly different emergency prep:
- Shut-off tool for recessed or hidden valves. Some Grohe and American Standard installations use recessed service valves; keep the tool that came with the fixture in the kit, or note whether you need a screwdriver to access the stop.
- The right caulk for your surround. A tube of the correct caulk for your specific surround material lets you re-seal a joint that splits after a leak. Ask your installer to leave a tube with the brand you’ve installed, or note the type in the kit.
- Manufacturer parts sheet. The card that came with the valve cartridge or faucet tells you the model number, which is what a repair tech needs to bring the right part – especially for higher-tier brands like Toto or Grohe where the part is not interchangeable with a builder-grade replacement.
- A soft, fine-tipped scraper or putty knife for lifting a loose caulk line without gouging the surround or tub wall.
Keep the sheet, not just the tools
The most useful item in the kit is a laminated card: valve locations, main shut-off, a one-line summary of your fixtures and brands, and the number for help. Tools without knowledge are just clutter. If you’ve had a shower or tub converted, add the brand of the new fixtures and the date the work was finished to the card.
Which Fixtures Fail First, and When to Replace Them
When a bathroom fails, it rarely does so randomly. It fails on a timeline set by the age of the fixture, the water quality, and how often it’s been touched. Homeowners who know the order of failure can replace proactively, before a leak forces the decision. Here’s the order we watch for in North Las Vegas homes.
The usual order of failure
- Flexible supply lines at the crimp. These fail from the inside out, and hard water accelerates it. Any line older than about a decade, or any line that shows crusting at the fitting, is a candidate.
- Fixture shut-off valves. These stiffen from scale and fail to close fully. They’re cheap to replace and expensive to trust.
- Toilet flappers and fill valves. These cause slow leaks that run constantly, and a running toilet is the most common quiet water waster we find.
- Shower cartridge and mixing valve parts. These take the most mineral load, especially in hard-water markets.
- Drain pans and grout seams. Slow failure at the pan or a caulk line opens a path for water to reach the subfloor.
When to replace rather than repair
There’s no single age that says “replace now,” but there are signals: a shut-off that won’t close, a supply line that feels stiff, a surround joint that won’t hold caulk, or a valve brand whose cartridges are no longer available. If you’re seeing two or more of these, it’s usually cheaper to plan the replacement than to wait for a failure and pay for water damage on top.
Older bathrooms, especially, often have several of these items at once. In the Whitney neighborhood, where many homes have accumulated layers of fixture updates over the years, we often find a mix of new and original parts side by side, which makes a proactive checklist more valuable than a single blanket rule.
When Preparedness Turns Into a Remodel Decision
Sometimes the most prepared thing a homeowner can do is realize the bathroom is due. If you’re adding three new valves, a new supply line set, and a waterproofing layer to a bathroom that’s still on original tile, you’re halfway to a remodel, and doing it piecemeal can cost more than planning it once. That’s a decision worth making calmly rather than in the middle of a leak.
Signs the bathroom is ready to be planned rather than repaired
- The surround tile or tub is cracked and the pan or wall behind it can’t be sealed reliably.
- The layout no longer fits the household – a tub nobody uses, a shower too small to be safe, or a threshold that’s become a trip hazard.
- You’ve replaced two or more supply lines, valves, or cartridges within a couple of years.
- You want a step-in shower for accessibility, which is a job a bathroom specialist can design properly rather than retrofit around existing plumbing.
A tub-to-shower conversion is often the right call for aging in place, because it addresses both the safety and the layout in one project. We handle full bathroom remodeling, walk-in shower installation, and tub-to-shower conversions as our three core services, which means the people planning your project do nothing else. That focus is what we mean by bathroom specialists, not generalists.
Common Mistakes to Avoid
- Never testing the shut-off valves. A valve you’ve never turned is a valve you can’t count on. Test each one once a year so a failure doesn’t turn into a flood.
- Looking for the “perfect” valve while the water spreads. If the fixture valve won’t close, go to the branch or main immediately. Speed beats precision in the first minute.
- Cutting drywall before documenting. Opening the wall to “see the damage” before taking photos can complicate a claim and add cost. Photograph first, then investigate.
- Ignoring hard water crusting at fittings. In North Las Vegas, scale at the crimp is a real failure point. Don’t dismiss a crusty fitting as cosmetic.
- Trusting a builder-grade cartridge with no parts availability. A valve you can’t source a cartridge for will have to be replaced, not repaired. Choose serviceable brands when you have the choice.
- Remodeling without updating the supply lines. A new vanity or tub in front of old lines is a risky combination. Replace the lines and stops as part of the work.
- Treating the emergency kit as clutter. A kit in the hall closet, with a laminated valve map, is the fastest response you can build. Keep it accessible.
See the difference
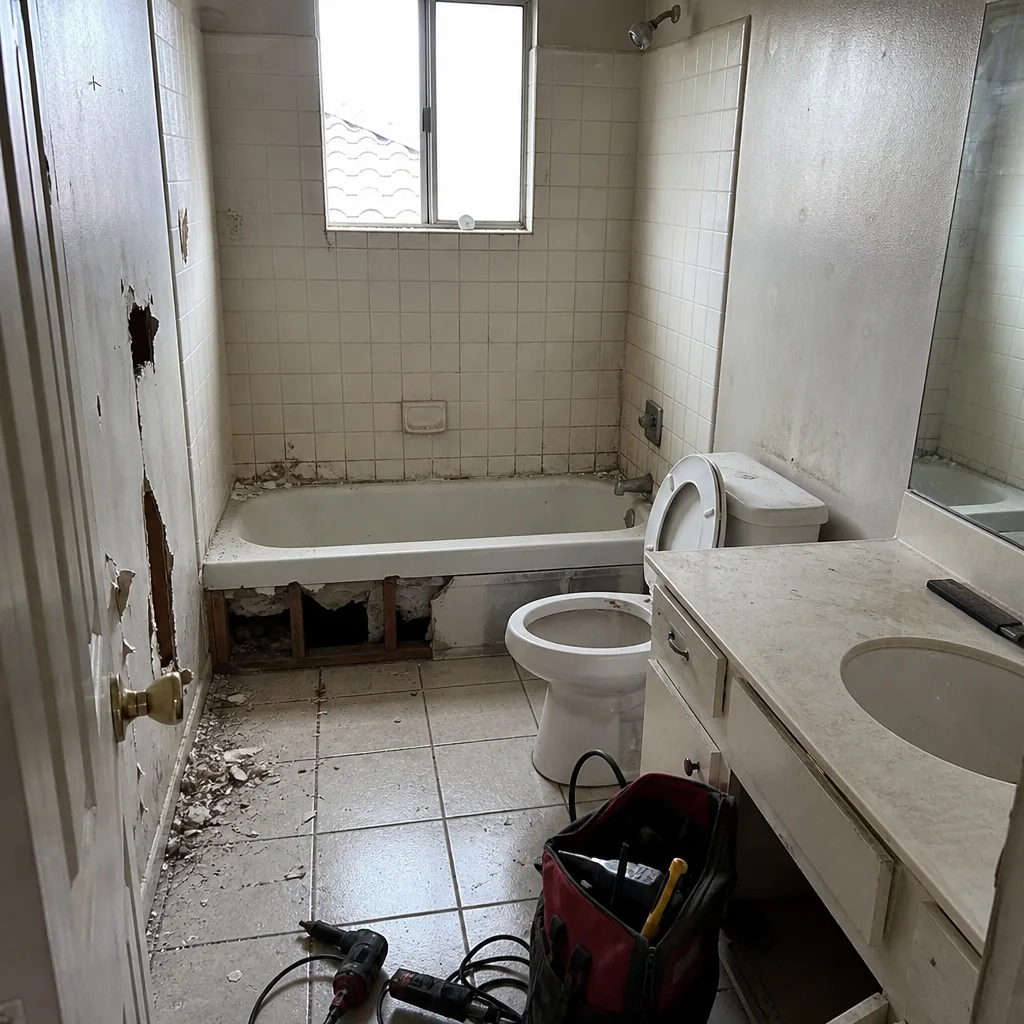 Before
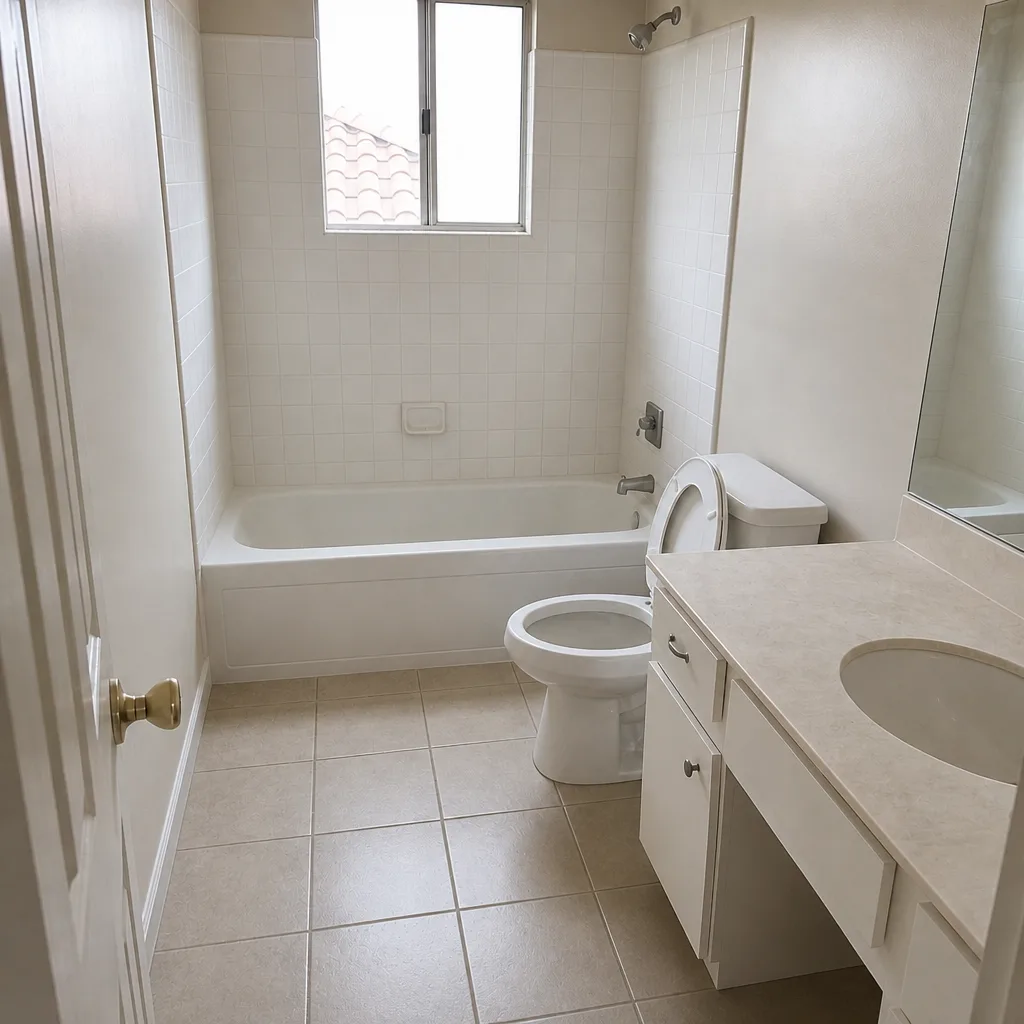 After
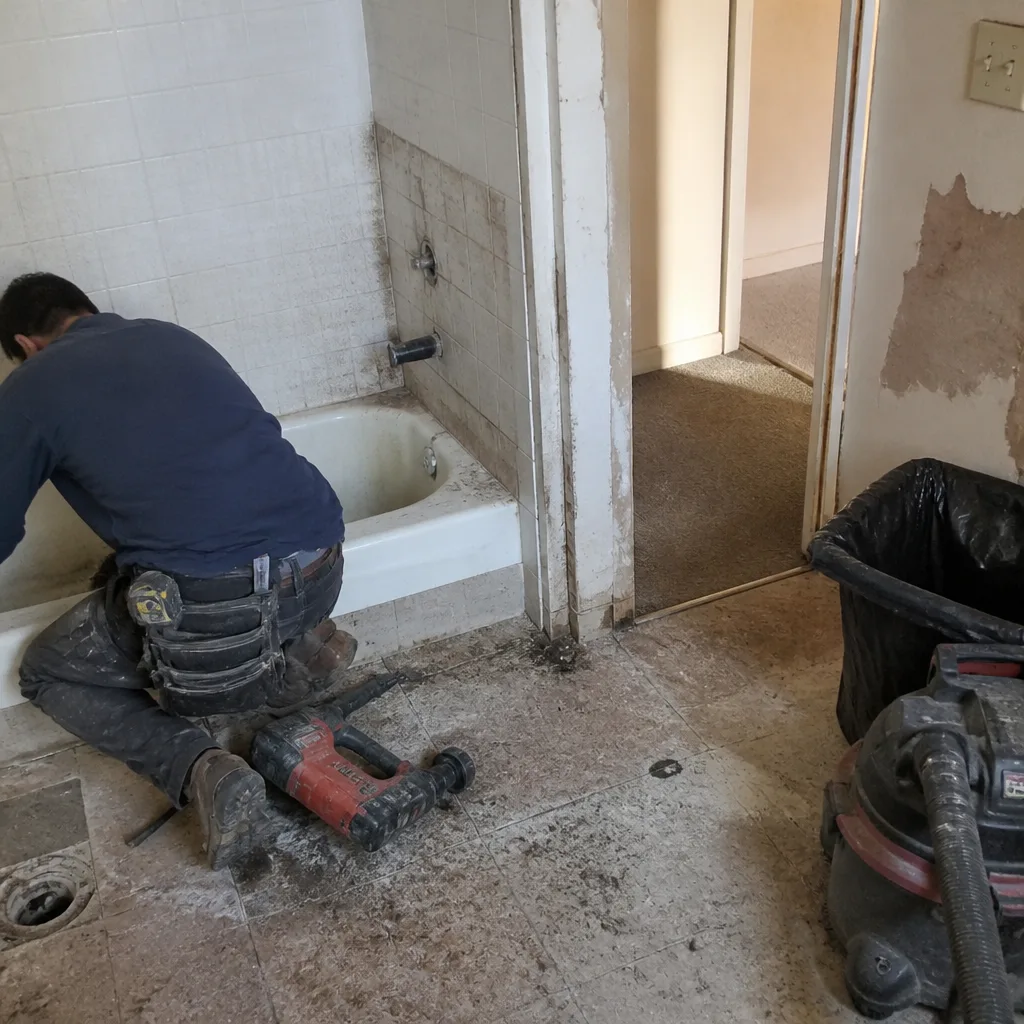 Before
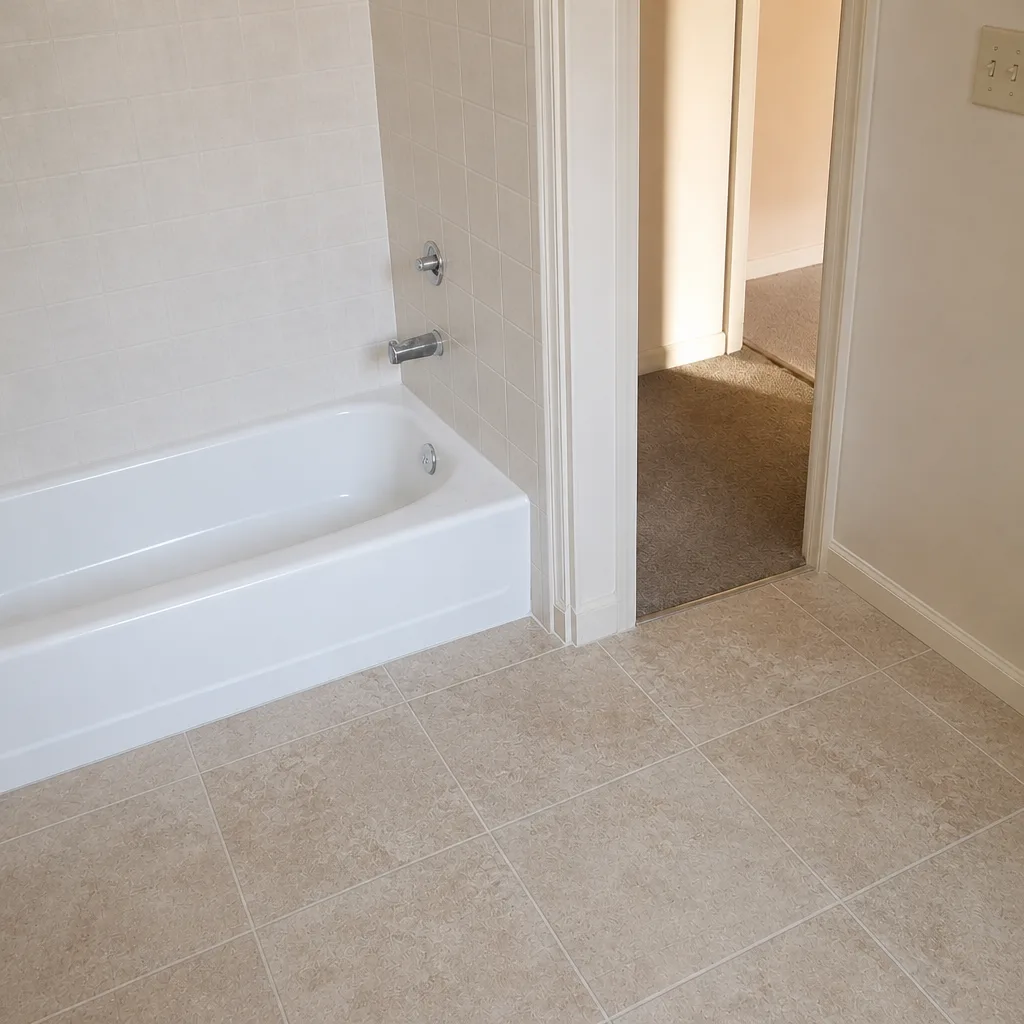 After
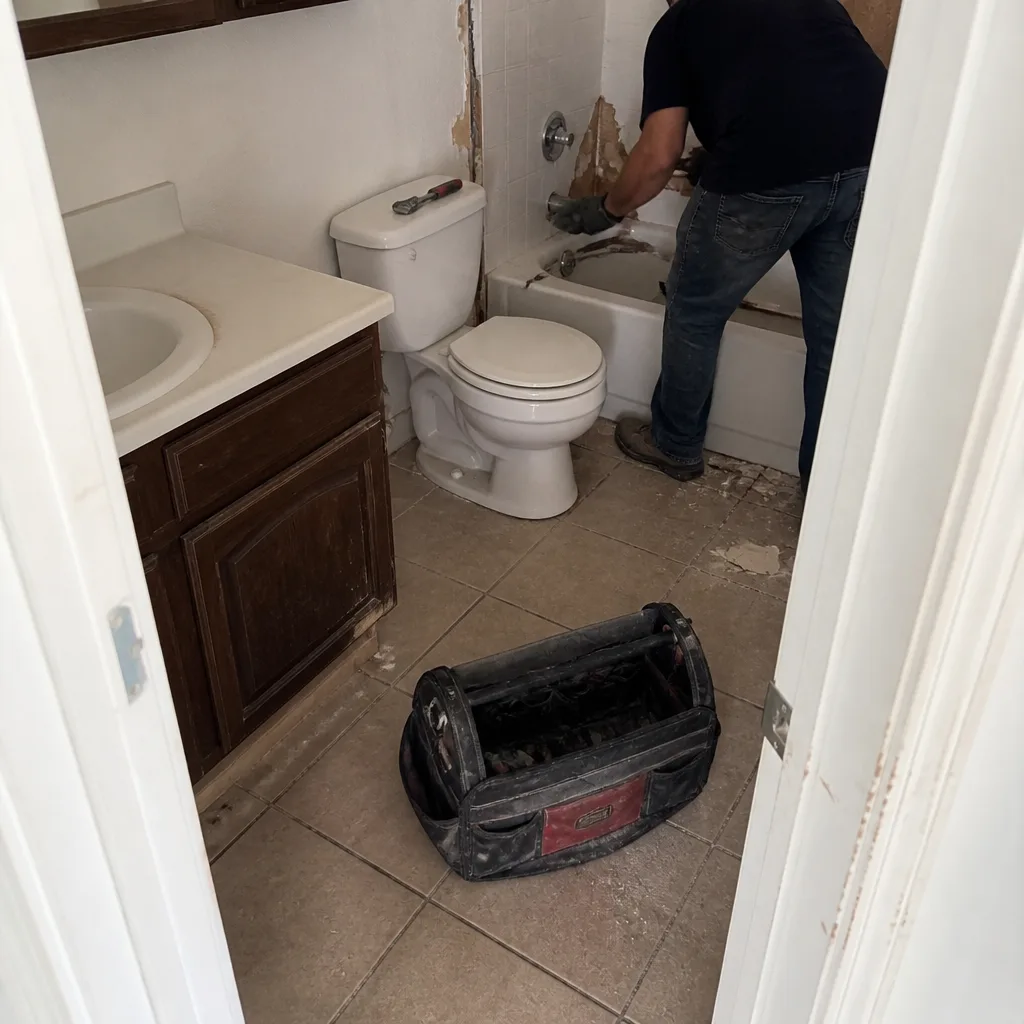 Before
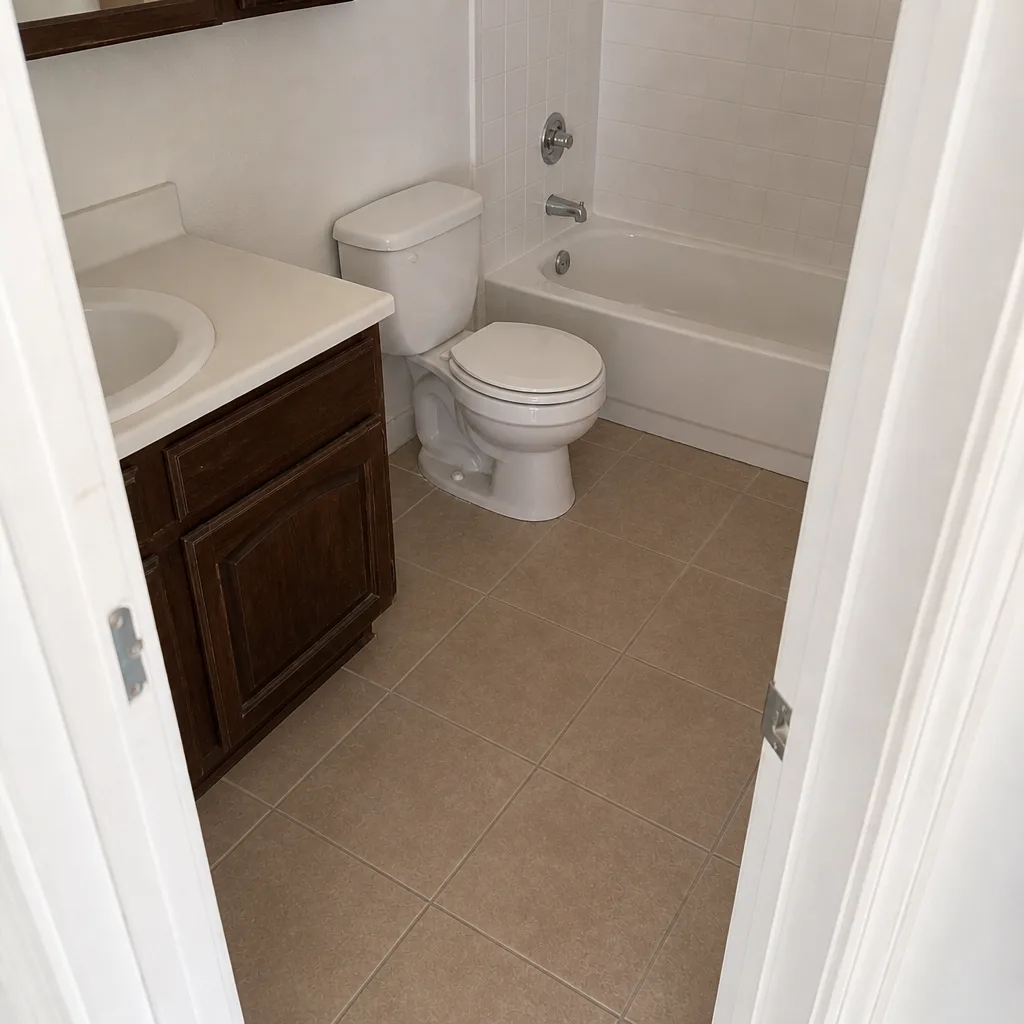 After
When to Call a Professional
Call a professional when the water won’t stop at the fixture valve, when the leak is near electrical wiring or the panel, when a shower pan or drain is suspect, or when you’re seeing repeat failures across several fixtures. A trained technician can shut down the leak, assess water spread, and tell you what truly needs replacing. Our technicians have up to 9 years of experience with exactly these bathrooms. Bathroom Remodeling North Las Vegas offers free estimates in North Las Vegas – call (844) 834-0636. We answer 24/7. Fast dispatch from 7am to 7pm, Sunday through Friday, closed Saturday. If you’d rather plan than repair, our bathroom remodeling specialists can stage a valve map, supply line upgrade, and fixture plan in one project.
Frequently Asked Questions
The most important one is the fixture shut-off closest to the leak, because it stops water fastest. For a leaking toilet, that’s the angle stop behind the bowl; for a sink, the hot or cold stop under the cabinet. Before you need it, find your main shut-off too, so you have a backup if the fixture valve won’t turn.
First, close the water at the nearest valve or at the main shut-off so you’re not feeding the leak. Then switch off the bathroom circuit at the breaker panel if water is anywhere near an outlet, and call for help. Call (844) 834-0636 – we answer 24/7, with fast dispatch from 7am to 7pm, Sunday through Friday.
Hard water leaves mineral scale inside valves and supply lines, which stiffens shut-offs and weakens line crimps. That means fixtures here can fail sooner than in softer-water markets. Testing your valves once a year and replacing any that won’t close cleanly is the simplest prevention.
Yes, if the remodel includes new quarter-turn shut-off valves, new supply lines, and proper waterproofing behind the tile. A bathroom specialist can lay out the valve map and fixture brands at install and document the work, so a future problem is easier to stop and easier to claim. Call (844) 834-0636 for a free estimate.
We offer free estimates and can assess the leak, water spread, and fixture condition, then tell you whether repair or a planned remodel is the better move. We focus on three services: full bathroom remodeling, walk-in shower installation, and tub-to-shower conversion. Call (844) 834-0636 to schedule.
The basics include wrenches, towels, a bucket, a flashlight, waterproof tape, and a temporary patch. Add the specific tools and parts sheet for your installed brand, because a Grohe or Toto cartridge or a recessed service valve may need the right tool and the model number to source a replacement. Keep a laminated valve map in the kit as well.
The Bottom Line
Bathroom emergencies don’t need to be disasters. The homeowner who has found and tested every shut-off, documented the fixtures, and packed a kit responds in minutes; the one who hasn’t spends an hour looking for a valve while the floor soaks. Hard water in North Las Vegas makes all of this more urgent, not less, because it accelerates the wear that turns a drip into a leak. Preparedness is a short list of habits done once a year: test, document, kit, and know when to call. If you’re ready to plan the renovation that puts new valves and waterproofing behind your tile, call (844) 834-0636 for a free estimate. We answer 24/7. Fast dispatch from 7am to 7pm, Sunday through Friday.
Written by the team at Bathroom Remodeling North Las Vegas.